Press Sample
Hey guys! Today I have Junes's Fandom Flakies Box to share with you. This box consist of three polishes. The polishes are made by Bee's Knees Lacquer, Night Owl Lacquer and a guest maker each month. The guest maker this month is Wildflower Lacquer and their fandom theme for this month is Tiger King. Read on for more info!
Bee's Knees Lacquer-I'm Never Gonna Financially Recover From This
Described as a money green polish with holo flakies and red to orange to green iridescent flakies.
Shown here in 3 coats plus top coat.
Formula was good and applied well.
Dries with a texture.
Top coat needed for a full, glossy finish.
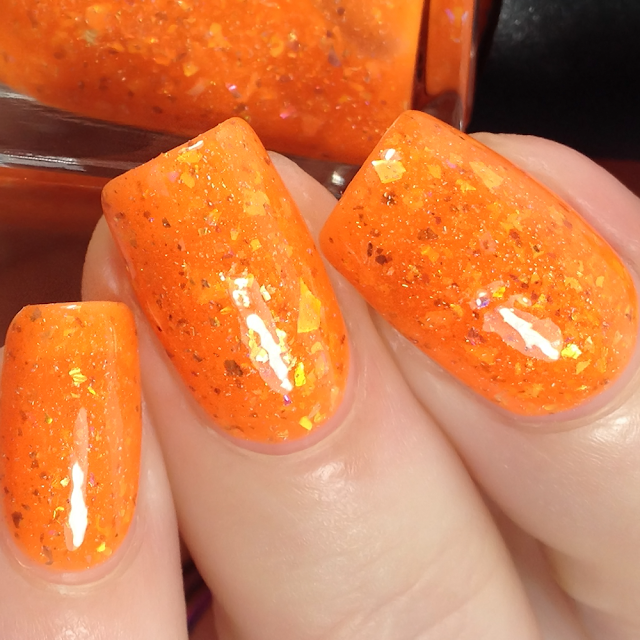
Night Owl Lacquer-I Saw a Tiger
Described as a bright orange with holo dust, charcoal flakes, pink/gold/green and orange/green/gold crystal chameleon flakes.
Shown here in 3 coats plus top coat.
Formula was good and applied well.
Dries with a texture.
Top coat needed for a full, glossy finish.
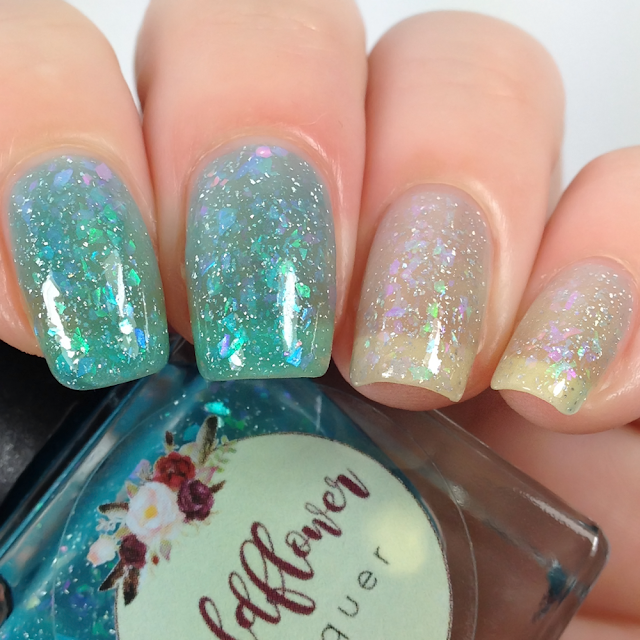
Wildflower Lacquer-Here Kitty Kitty
Described as a teal leaning blue thermal(cool) to colorless(warm) packed with blue to green crystal flakies, scattered holo flakies, and subtle red to green shimmer.
Shown here in 3 coats plus top coat.
Formula was good and applied well.
Dries with a texture.
Top coat needed for a full, glossy finish.
 |
Ribbits and Stickits-Waterslide Decals
Instructions:
1. Paint nails, let dry completely.
2. Cut out the desired image.(Try cutting as close as possible to the image)
3. Place in warm water for 5-10 seconds.
4. Using your thumb & index finger slide the paper backing from the image.
5. Lightly dampen the back of the decal.
6. Place image on your nail, pressing down to remove any air bubbles.
7. Seal it with a top coat.
Tip:
If you prefer to use the decal over a colored/darker polish it's best to paint the back of the image with white polish/acrylic paint letting it dry before applying it to the nail.
Ribbits and Stickits-Vinyl Stickers
Instructions:
1. Scrape over the entire image going over it several times(use a credit card or something with a thin hard edge) This will help the vinyl stick to the transfer sheet.
2. Place the decal face down & slowly peel the white backing from the translucent transfer sheet.
3. Slowly remove transfer sheet, making sure all of the pieces of the vinyl are sticking to the transfer tape.
4. Clean the surface where you are applying your sticker.
5. Add your sticker to the surface, smooth down.
6. Take your scraper & scrape all over the image(use your fingers if scraping isn't an option)
7. Slowly & carefully remove the transfer sheet leaving your sticker decal in place.
Available June 12th at noon EDT
and ends 6/19 at 11:59pm EDT


CONVERSATION